An AtomPub Server for MarkLogic Server
Table of Contents
The Atom Publishing Protocol is an application-level protocol for publishing and editing entries in an Atom Feed.
The protocol's design centers around sending and receiving XML representations of the resources. The Atom protocol server is expected to maintain these collections of entries, respond to requests for creating, retrieving, and updating them, and manage ancillary XML representations that describe the services available to clients.
These are all things that MarkLogic Server was designed to do.
I decided to see how easy it would be to implement a fully conformant Atom Publishing Protocol server in XQuery on top of MarkLogic Server. The answer: remarkably easy. The entire implementation of the core server is less than 2000 lines of XQuery.
This distribution includes that core implementation plus a very tiny weblog application designed to demonstrate how it could be used.
1. What's in the distribution
The distribution consists of three parts:
- AtomPub
This is the code for the core server.
- WebLog
This is the code for the toy weblog implementation that demonstrates the server.
- doc
This documentation.
2. How it works
If you're unclear about how the Atom Publishing Protocol works, please read the RFC. This section assumes that you have at least a passing familiarity with AtomPub concepts.
Fundamentally, AtomPub is a simple protocol for interacting with feed entries over HTTP. One of the interesting parts, with respect to implementing a server, is dealing with security and authentication.
The goal is to interact with a Atom feed that publishes entries that everyone can read. That means that we can't require authentication to read the entries. At the same time, we don't want anyone to be able to change the entries. That means that we must require authentication to create, update, or delete entries.
There are many ways that we might accomplish this goal, but the Atom Publishing Protocol mandates that we use HTTP authentication for this purpose. That is, an AtomPub client will expect to connect using standard HTTP authentication mechanisms.
The rub is that HTTP authentication doesn't distinguish between kinds of access. Resource access either requires authentication or it does not.
This means that there's no practical way to simultaneously use standard HTTP authentication and allow read access to a resource without authentication and write access with authentication.
Many AtomPub servers address this problem by providing two different URIs to interact with the same resource: so http://example.com/path/to/feed might provide read access without authentication (and no write access at all), while http://example.com/path/to/feed/edit might require authentication and provide full access to authenticated clients.
We have to do the same thing. In our case the easiest way to do this is to simple have two application servers (running on different ports, of course) that access the same database: one supports full access with authentication while the other supports only read access without authentication.
2.1. Security Considerations
In addition to the users and roles created explicitly during installation, the WebLog system adds users, roles, and privileges for users when they register.
For each user, uname, registered, the system creates:
A user named uname.
A URI privilege named weblog-edit-uname
A role named weblog-editor-uname
2.2. The Error Handler
The toy WebLog makes extensive use of the error handler to deal with requests for feeds which don't exist at precisely the URIs requested.
This code predates the addition of a URI rewriting mechanism in MarkLogic Server. It's probably worth considering using the rewriter instead of the error handler.
2.3. Alerting
In a real WebLog, you might want to associate alerts with PUT and POST events. Example code for accomplishing this is present (but commented out) in /AtomPub/put.xqy and /AtomPub/post.xqy.
3. Installing the distribution
The following steps describe how to install and configure the AtomPub server and the WebLog server. These instructions were designed to be simple and straightforward, along the way we'll point out where it might be useful to proceed with more care if you're deploying into a production environment.
Copy the AtomPub directory to /opt/MarkLogic/Modules/ (or wherever the modules directory is on your system).
Note
I wanted to make it possible for the WebLog application to create new accounts automatically. Even in the testing phase, I didn't really want to have to manually create users.
But that introduces the circular problem of allowing non-authenticated users to do something that's effectively an update to the database.
The solution is to “amp” selected functions. For more information, see 19.0 Security Administration in the MarkLogic Server Administrator's Guide.
It's not possible to “amp” code that's run from the filesystem, so you must put the AtomPub modules in the servers module directory or in a a modules database.
Create roles. The system uses three roles: weblog-reader, weblog-editor, and weblog-admin. These roles exist mostly with an eye towards future extension, there isn't that much difference between them today.
The weblog-reader must have the following execute privileges: unprotected-collections, xdmp:add-response-header, and xdmp:invoke. It must also have the filesystem-access (read) capability.
The weblog-editor must inherit the weblog-reader role.
The weblog-admin must inherit the weblog-reader role and have the unprotected-uri execute privilege.
Create users. You need to create two users, the rest will be created automatically.
Create joepublic with the weblog-reader role. This is the user that will be used to access the unauthenticated, “read only” server.
Create weblog-admin with the weblog-admin role.
Create a “weblog” forest and “weblog” database to hold the feeds.
Create the public appserver on port 8600.
Specify the “atompub” database as the database, the location where you installed the “WebLog” directory as the root, use “application-level” authentication with “joepublic as the default user. Specify /error-handler.xqy as the error handler.
Create the authenticated appserver on port 8601.
Specify the “atompub” database as the database, the location where you installed the “WebLog” directory as the root, use “basic” authentication (or any scheme that your client supports) with “nobody as the default user. Specify /error-handler.xqy as the error handler.
Create two “amps”, one for create-putative-user and one for create-user. Both are in the http://www.marklogic.com/modules/atompub/admin namespace and have the document uri /AtomPub/admin.xqy.
For convenience, just give them the “admin” role. It would be possible to give them something more constrained in production, but this is the easiest thing to do for testing.
Initialize the database with global configuration information.
If you deviated from the instructions above, used different user names or different ports, for example, then make sure you edit /WebLog/setup/load-config.xqy before you run it!
When you're ready, log into the web server as weblog-admin and run /setup/load-config.xqy. This will setup some default values.
4. Configuration
Global configuration information for the repository is stored in /etc/configuration.xml. Here's what the default looks like:
  1
  2 <configuration xmlns="http://www.marklogic.com/ns/atompub"
                   xmlns:app="http://www.w3.org/2007/app"
  4    	    xmlns:atom="http://www.w3.org/2005/Atom">
      <root>http://localhost:8600</root>
  6   <edit-root>http://localhost:8601</edit-root>
      <generator>Mark Logic AtomPub V0.0.3</generator>
  8   <module method="post">/AtomPub/post.xqy</module>
      <module method="put">/AtomPub/put.xqy</module>
 10   <module method="validate">/AtomPub/validate.xqy</module>
      <module method="format">/AtomPub/format.xqy</module>
 12   <weblog-reader>joepublic</weblog-reader>
      <weblog-path>/u/</weblog-path>
 14
      <reserved userid="admin"/>
 16   <reserved userid="weblog-admin"/>

 18   <user userid="ndw">
        <email>ndw@nwalsh.com</email>
 20     <title>Test Weblog</title>
      </user>
 22
      <putative-user userid="newuser">
 24     <username>newuser</username>
        <password>password</password>
 26     <email>newuser@example.com</email>
        <title>My new weblog</title>
 28     <token>4615241119106240758</token>
      </putative-user>
 30
    </configuration>
- root
This is the beginning of URIs that refer to unauthenticated feeds.
- edit-root
This is the beginning of URIs that refer to authenticated feeds.
- generator
This is the generator string that the server will place in feeds.
- module
There are four modules: post, put, format, and validate. Each module identifies a query module that should be run to perform the indicated method. The “post” and “put” methods are called for HTTP POST and PUT requests, respectively. The “validate” module is called for any document being added or updated, if it returns false the entry is rejected. The “format” module is called when a normal user is reading a feed, it can translate from the native feed format into HTML, for example.
If you setup different collections, each collection can have its own methods.
- weblog-reader
This is the name of the weblog reader account.
- weblog-path
This is the path to weblog entries. The format of URIs that point to weblog entries is {root}{weblog-path}{username}.
- reserved
The code that allows users to add themselves to the database checks for reserved accounts and will refuse to allow users to add accounts with reserved names.
- user
For each user, we store their email address and the title of their weblog.
- putative-user
Putative users are ones who have done only the first half of the registration process. When (if?) the second half of the registration process is performed, we create an actual user in the security database using the specified password, then we can forget it here.
5. Testing the install
Navigate your browser to http://localhost:8600/. (Or whatever host and port you used for the installation.) You should see a screen that looks like this:
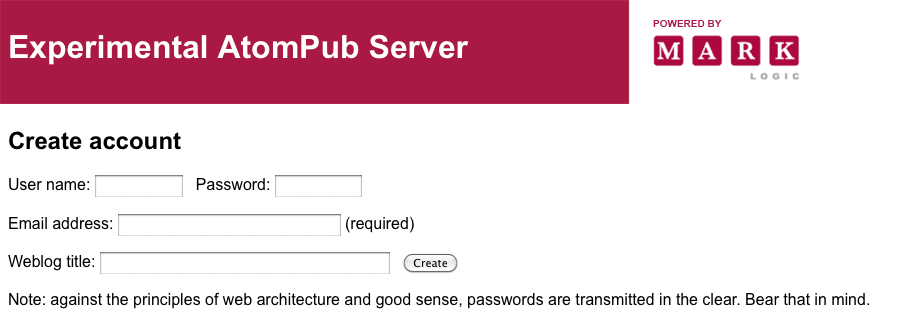
If you fill in the fields for “testuser” and click , the server should respond:
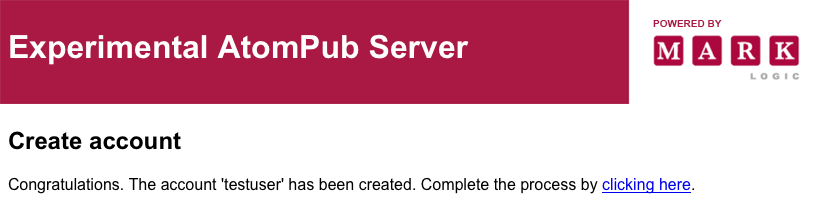
Clicking on “clicking here” will close the loop and finish creating the account. (There's code in there for doing this by email, but it's commented out.)
Now if you go back to the main screen on port 8600, you'll see the user listed. If you point an AtomPub client at port 8601 and authenticate as “testuser”, you should be able to edit the feeds!